Guest Author Urvesh Avinash Bharambe is a Product Designer from IISc Bangalore. He is a great photography enthusiast. Thanks to Urvesh for contributing this article. Urvesh is available in Twitter as @UrveshDesigns |
Everyone loves to have control over the situation in which they are present. People like dictating their own terms. Same applies to the field of photography too. You wait for the perfect sunlight to come up, so that you can take beautiful portraits of your model, or you can have the soft diffused uniform light on the flowers and get the beautiful saturated colours out of them. People wait for that few minutes at the dusk or the dawn to get the flattering light that make the picturesque landscapes.
Most of the time, light may not in your control; it’s in the hands of Mother Nature, unless you own a dozen of SB-900s that can turn the day-shot into a night-shot and vice versa. There is one realm of photography where it is not only important to have control over the light, but you have to depend on artificial source of light to have a creative control over what pops up on your LCD when you press the shutter of your camera.
Here I come up with one of my first encounters in this realm of photography called as Product Photography.
The Product
After the successful prototyping of the Centenary Pro Guitar by Arunkumar Francis, it was the time to put it into presentable form to give due justification to the efforts that went in coming up with this guitar. A product is said to be incomplete unless it is presented well. To put it in different words, the design is incomplete if it is not conveyed properly to its users. A proper presentation here meant, getting exactly similar photographs of the product as per the initial renderings made.
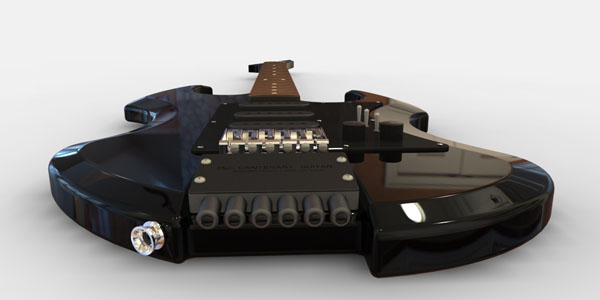
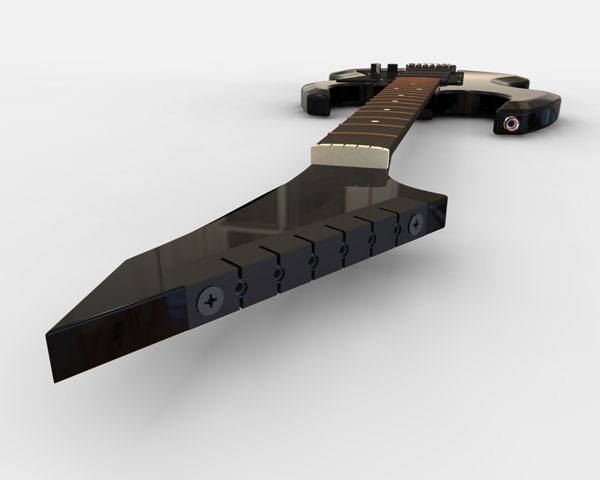
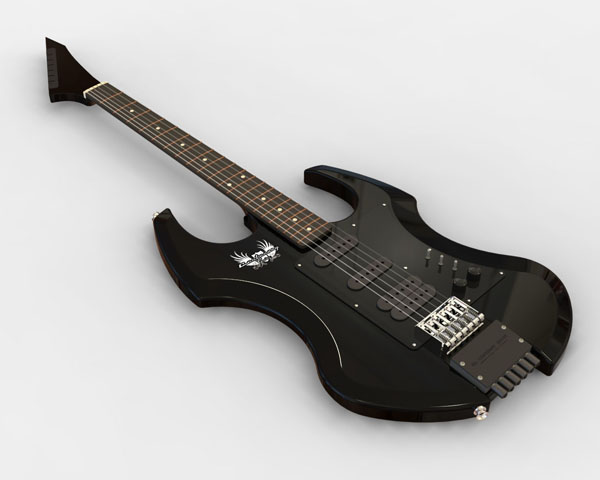
Initial Renderings in 3D Software
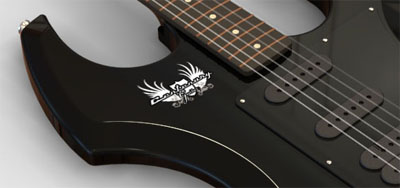
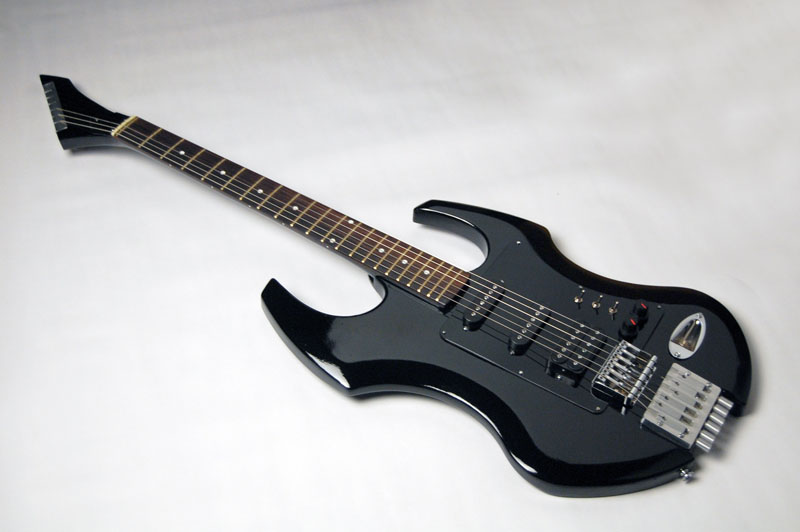
The important point that one should keep in mind while photographing products is to take full shots which will show the overall product and in addition to this, to highlight the special features, one should take shots that concentrates on these peculiar parts. Here the first two shots are the ones, which highlight the key features of the product, while the third shot is to give the complete view of the product.
The Challenge
This was important so as to justify that the final outcome is similar to what you had conceived initially. Imagining things and coming up with new ideas is not that difficult compared to bringing it into realization and to be able to convey it to the audience effectively. It is said that “A picture is worth a thousand words”. So now it was the time to prove this quote to be true. No words, only a picture and that should be able to present as many details of the product as possible.
The brief for this photo-shoot was slightly different, as here apart from getting the maximum details out of the product in a single photograph, it was important to get the exact views as that of the initial renderings of the product. Seeing my enthusiasm and interest in experimenting with different photographic techniques, Arunkumar Francis asked me if I would be able to do this. I was confident but at the same time was nervous too as there were some expectations involved, unlike my experiments where I get delighted at unexpected outcomes also!
The Setup
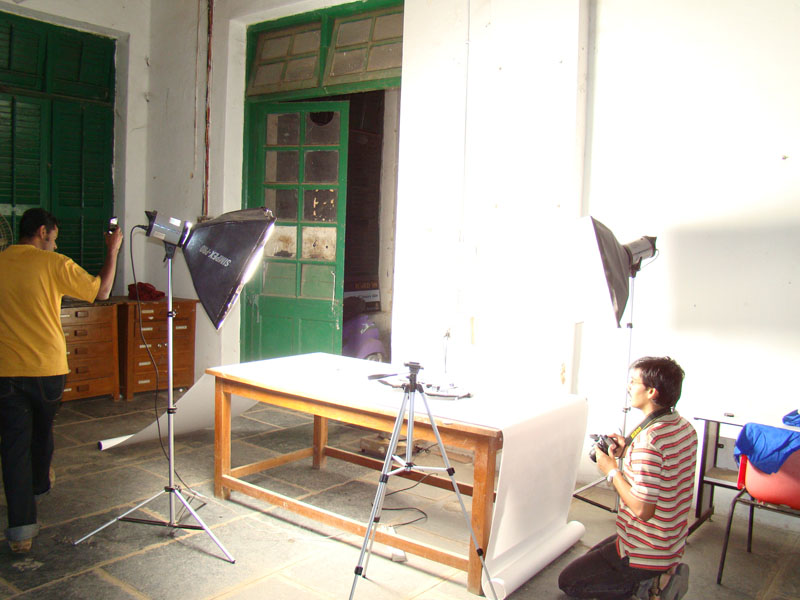
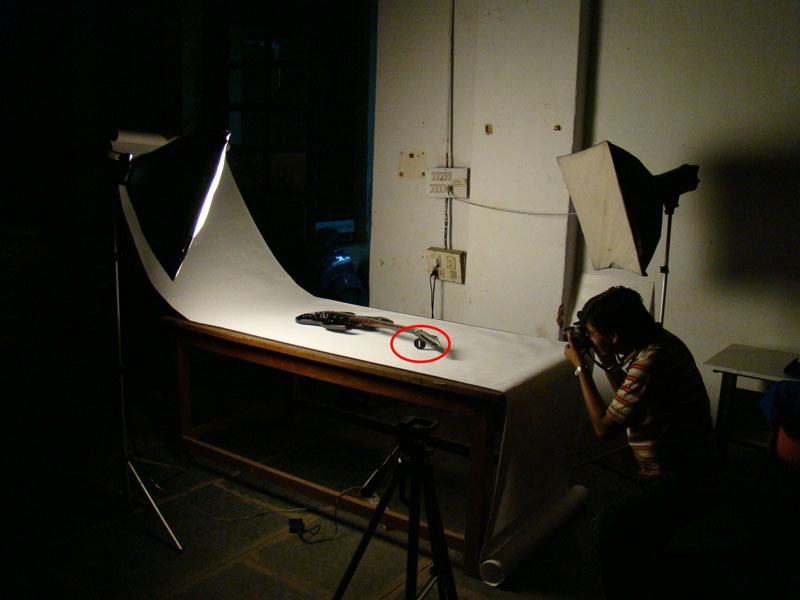
It was decided to carry out the shoot during the night time, after dinner so that we can have complete control over the lighting. I promised to bring all my equipment along with tripod. The setup was cleaned of dust and the roll of seamless paper was spread over the table. We had two Prolinchrom 23 studio lights with soft-boxes with us to do the photo-shoot. Then the Centenary Pro Guitar was cleaned so as to leave no fingerprints or daubs on the shiny surfaces of the guitar. And then with utter care, this guitar was placed on the setup table. Arunkumar Francis had the required photos of the rendering in his mobile, which we were using as a portable digital frame to have an idea of the lighting and the required perspective of the product. This proved to be better than using a laptop, as it was handy and did not give bright light, which on the other hand would have demanded more time from our eyes to accommodate to the darkness.
Just one month back before this photoshoot, I had bought an AF Nikkor 50mm f/1.8 D lens, which gives the perspective of the human eye (on full-format sensors of course), which may prove to be good for product photography (You would not want your beautiful guitar to be distorted, right?) and being a fast lens, it was good for night photography and blurring out the background for portraits too. So in all, I felt that this was a good investment for me as a beginner in photography, apart from this being few of the lenses that I could afford buying from the saving that I make from my scholarship. Now I was eager to try out some “real” product photography and so put on this lens on my camera body and setup the lamps arbitrarily on the two sides of the tables. But later on the position of the light strobes was changed, so as to get minimum amount of shadows of the product on the table base as possible. (Similar to the floating objects on black background or on seamless white backgrounds seen in the hoardings and similar displays).
Capturing the first view
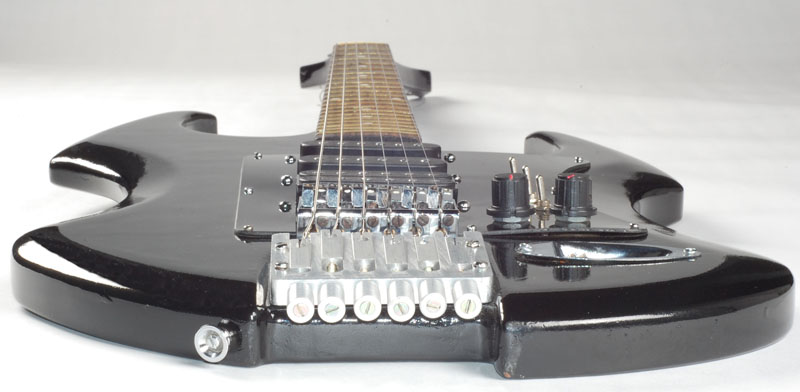
When the exact perspective and the view of the guitar was achieved, the lights were moved to do some fine adjustment, so as to get all the details on the guitar, which included, the body, the fret, the pickups, the bridge, all the knobs, and the main feature being the newly designed aluminum turning pegs for tuning and last but never the least were “curves on the body”.
On to the second view
So at this point, the first photograph out of the three required views was achieved and was left for later processing in the digital darkroom (read Photoshop editing). Now the second view from the front of the side of the headstock was to be taken.
For the second shot, we tried lot of iterations, like bringing camera near the headstock, to give the exaggerated view of the headstock and comparatively smaller body, but all was in vain.
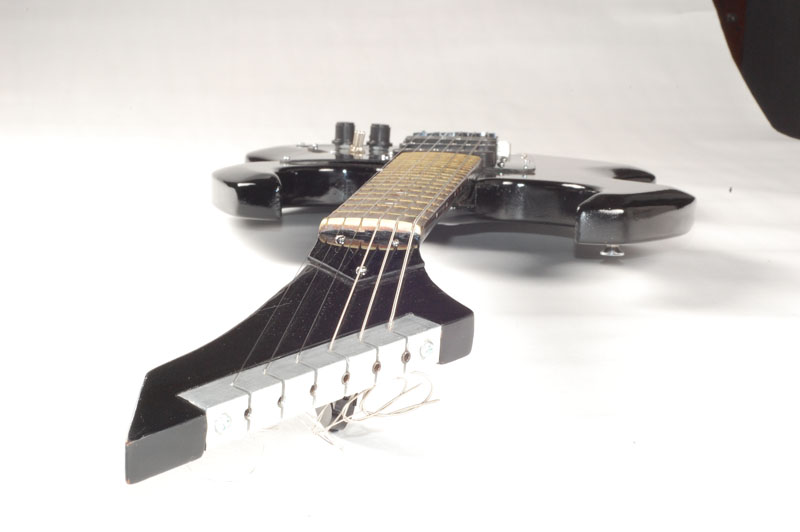
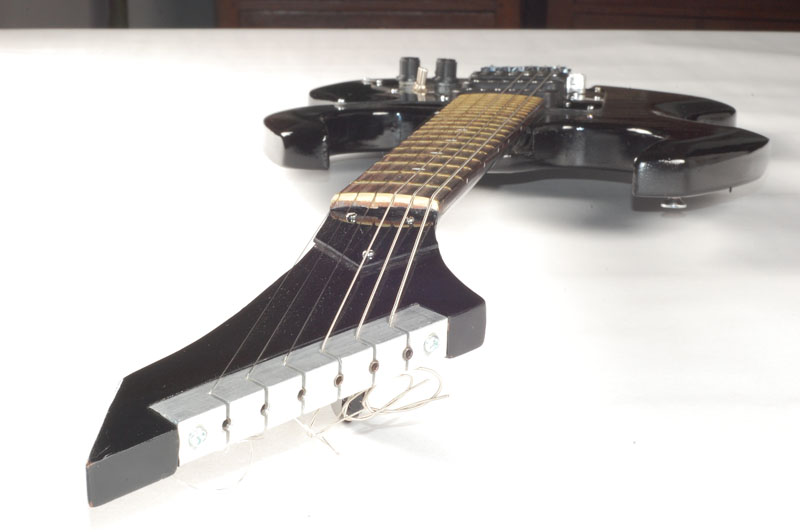
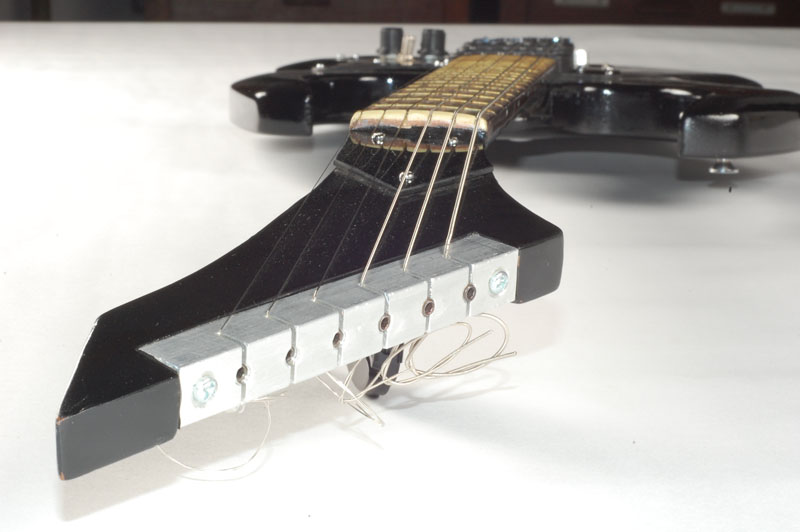
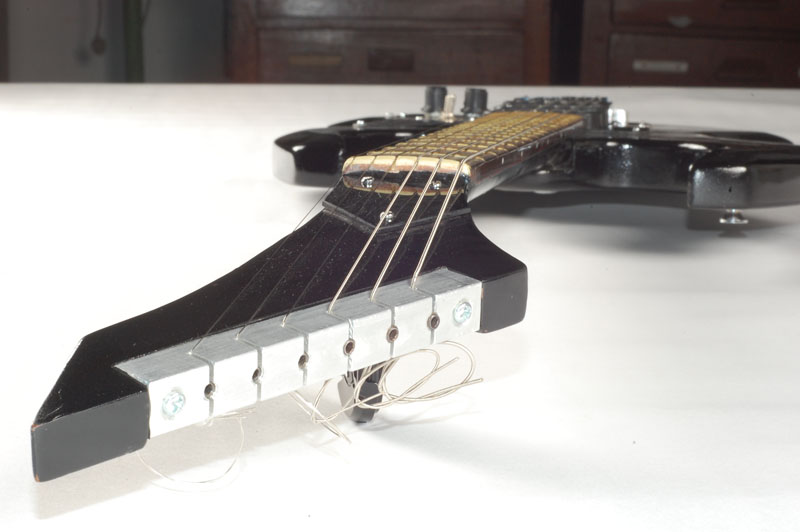
The view as seen in our digital photo-frame (read mobile) was not achieved. Then I realized that we can get this kind of distortion using a wider focal length. The peculiarity of this normal prime lens was to not to give any kind of distortion, and this is what was stopping us from getting the required view. So now I put on my AF-S DX Nikkor 18-55mm f /3.5-5.6G ED II, which is a kit lens that used to come with the entry level Nikon DSLRs. Nowadays they supply a VR version of this lens, but the one without ED (extra-low dispersion) elements, which in a way is a good strategy for Nikon to gain more money for a not-so-better lens.
Now after putting this lens, I could get the required perspective view of the guitar and then achieving the required lighting was an easy task.
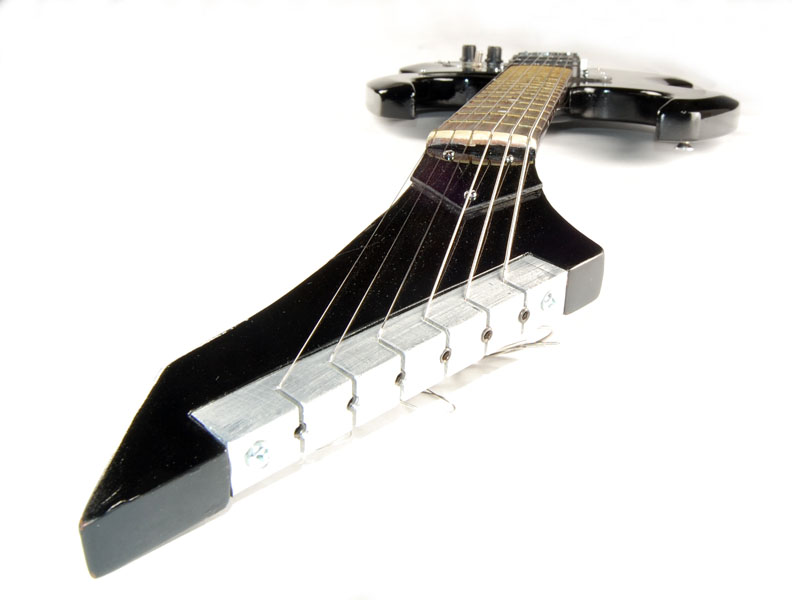
One point that should be taken into consideration for this kind of product photography is to keep the aperture at its minimum, i.e. at maximum f number, so as to have the complete product into focus. Also when you focus, you should choose the focus point (out of 3, 9, 11, 51 or whatever number of focus points you have), that falls at around 1/3rd of the length of your product or try to focus at 1/3rd the length of the scene. This will help you get optimum depth of field for the aperture that you have chosen. One more point to be taken into consideration is that the shadows don’t show up around the product, you can either arrange the lights in a manner that will help fill all the shadows or else try elevating the product from the surface of the table; this will throw the shadow below the product. Here in this setup we had used the lens cap (shown in the picture below) to lift the Guitar’s fret so that no hard shadows are formed around that.
The Last Shot Standing
Finally the last shot was left in which we had to show the complete view of the guitar. For this we wanted a view from an elevated place, so as to maintain the normal perspective of the guitar, or in other words to get a bird’s eye view unlike the distorted perspective view. We did not have any camera boom stand or crane, so the easiest way was to climb a chair and take the photograph.
First shot was taken, the perspective and view was the one that was desired, but the image looked flat. All the details were not clearly visible. The details like fret, pickups, bridge, volume and tone controls were all visible, but the shape of the guitar or the curves cut on the guitar that are the characteristic features of the product were not visible.
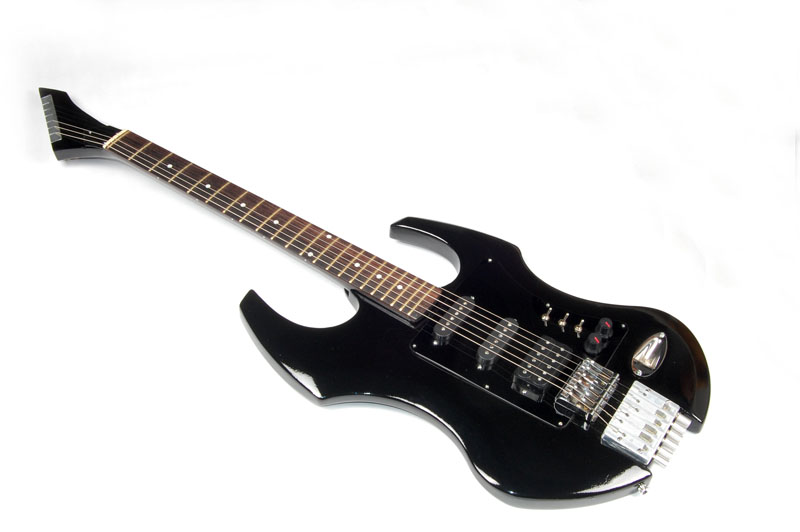
Now there were two options with us, either to arrange the lights in such a way that you get the required reflections from these surfaces, but then there are chances that the other arrangements or the fine adjustments, that you had done to throw the shadows away, are disturbed. The other option is to use the reflective cards or white boards, which can be a thermocol sheet, a flute board, a white sheet of paper, which will give different kind of reflections based on their surface properties. For e.g., a thermocol sheet will give a diffused light and a smooth reflection, while a flute board, having a shiny surface will give hard reflections on the surface. Now by holding the white sheet in different orientations the required details are ‘carved out’ on the body of the product.

As shown below, you can see the step by step improvement in the details that are seen on the surface contours.
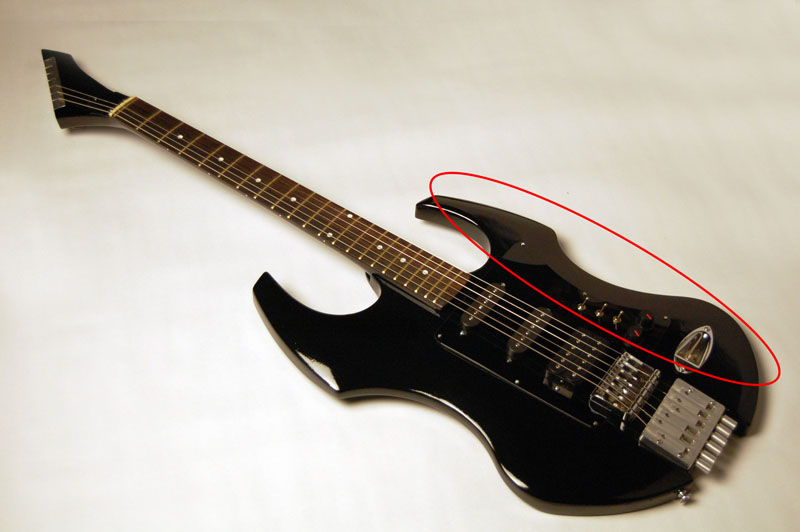
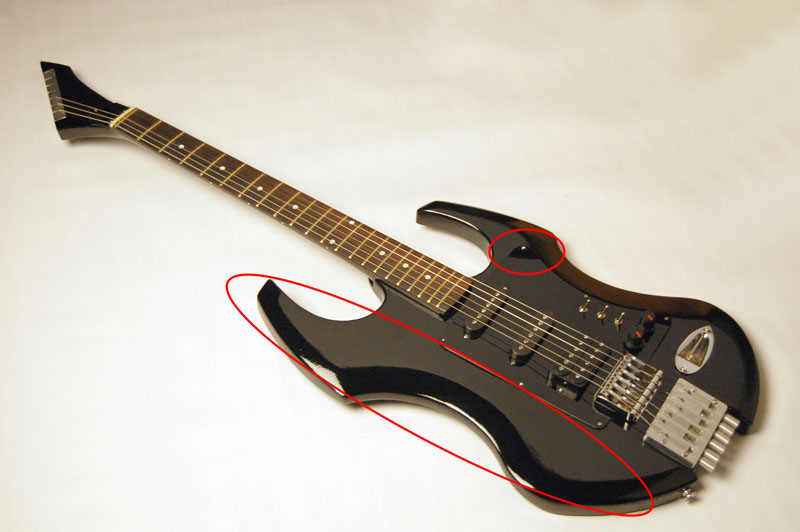

All the ones till here are having a slight warmer tone, while the one in the reference image was having a cooler tone, this was achievable by two ways, changing the white balance in the camera or else editing it later in the digital darkroom. The last image above shows the perfect details of the guitar giving details of the complete curves on the body, but the one shown below was to be achieved as it resembled the reference rendering. The difference between two is shown in the picture below.
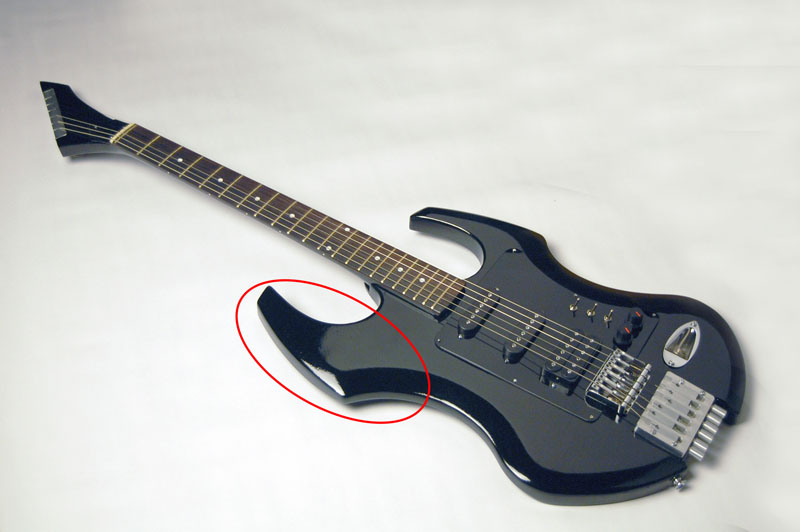
Well done, boy …
The final shot chosen by the client is the one shown below.
One thing I felt during the whole shoot is that it would have been better if we had a wider paper roll, so that we could have avoided using the clone-stamp tool to extend the white surface.
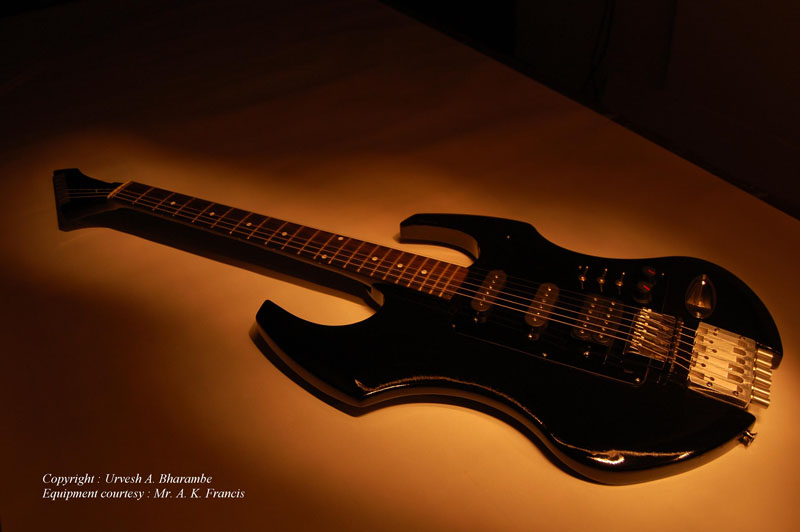
Now the Urvesh Touch : Light Painting
Finally we got the shot which was similar to the rendering in our digital frame and my client was happy with the results. We could get the 3 images which were exactly similar to the initial renderings of the product. Now it was time for some fun shooting and before I could request Francis to keep the guitar there for some more time for me to try out some more shots, he himself told me to try anything crazy that I would like to try. I usually carry a torch with me in my camera bag, so I thought of trying light-painting the guitar. Here are the results of the light-painting the guitar in the complete darkness.
The recipe for this kind of shot is as follows:
- Lock the focus on the Guitar when the room is lit, or you can use the auto-focus assist lamp to help focusing.
- Switch off the lights, so that no unwanted light is there in the scene.
- Go for bulb exposure in your camera, or if the bulb mode if not there go for a exposure of 10 sec or similar (based on trial and error) that may be sufficient for you to paint the guitar with light.
- Release the shutter and start painting the guitar with the torch light. Make sure to conceal the light source, otherwise you will end up with the intermittent streaks of lights in the scene (which obviously looks bad, unless you want them intentionally).
- Don’t forget to end the exposure (if in bulb mode) or wait till the shutter is closed, before you switch on the lights.
Last, but not the least
In the end, my deepest gratitude to AnasKA (antzFx), (my friend, my classmate, my project partner, my mentor and my critic for all my works) who has been after me since last 1.5 year, advising me to start a blog, and now for giving me a head-start by providing an opportunity to write in his blog. Thanks to Arunkumar Francis (my senior at CPDM, IISc, an ideal Product Designer and my daily dose of inspiration), for entrusting the photography of his wonderful work – Guitar on me and thanks to Amardeep Singh, (my friend, my room-mate and my companion in all my photo-shoots), without whom I would not have been able to write this blog entry, if he would not have covered the entire event. Thanks to my department, Centre for Product Design & Manufacturing (CPDM), Indian Institute of Science, Bangalore (for purchasing Prolinchrom 23 studio lights; this is one of the good things that they did in past), for letting me use the studio lights and the seamless paper roll. Thanks to my Mom and my family for buying me a Nikon D40 DSLR, which proved to be my stepping stone into exploring the beautiful realm of photography. Some people like to have a step by step kind of tutorial, but this being my first blog, I wanted to keep it in the narrative form and take readers through this encounter of making pictures, rather than just taking pictures.
My ultimate homage to my Guruani, Dr. Natasha Mhatre, whom I have considered as my Guru (though she doesn’t know this till now; I tried to be Eklavya :D) and try to replicate her style and derive inspiration from her.




Hey Urvesh,
The above Blog is Fantabulous….Am spell bound….
U have explained everything in such minute details that even a amateur can understand quite a lot of things…..And the pictures definitely speak for themselves….
Eagerly Awaiting your next blog….:)…
PS.: Please don’t make us wait much for your next blog ……….:)
Too good!
Nice work… Keep it coming…
Hi Urvesh,
Good going, I think the title says the most important thing and then you’ve worked it through with that idea. Good stuff, keep shooting!
And thanks, I feel like a bit of an impostor when people say things like that about me. Especially since now I shoot less than once a month! 🙂 but thank you, I’m glad at least someone is getting something from all the stuff I did.
Wish you the best.
Prachanda bhari.
Process kfup chaan explain kelays. Avadla.
Light Painting chi idea pan bhari watli.
Awesome… I’m speechless, had never thought, photography can ever be so detailed…
@ Vishrut: Thanks bud! But all these details increased the length of the blog. I was worried about that. 😛
And yes, if antzfx(AnasKA) is permitting me, I will surely come up with many more of similar blog entries 😉
@ Tejas, Abhijit, Anish, Nikhil: Thank you all very much for appreciating. 🙂
@ Natasha: Thanks a ton! I knew you will notice that title. 😀
And for you feeling like that, I will say that it shows your modest pretensions and the fact of you being plentiful and large. For me, you will always be my Guruani.
Experienced and agreed that busy schedules, decreases the shooting frequencies. 😛
Thanks again for your wishes.
Good going Urvesh..Keep it up…
Hi Urvesh,
I think it was simply amazing………….
Ur talent shows, u have lot of potentials……..try to grab it.
Keep going! Excellent one!
God bless u.
Solidd ! I liked the engineering approach. Keep shooting 😀
@ Ashutosh: hehe Thanks. I also learnt this pretty later when I was explaining this to my friend. 😉
In fact, this was an exercises where we could comprehend what had happened, only after execution. This was done in Feb, last year (2009), so it helped a lot later on in understanding the behaviour of shadows and reflections. 🙂
@ Jay: Thanks dude!
@ Sheeba di: Thank you very much for appreciating. I am obliged. Thanks for your wishes.
@ Vishal: Hahaha! Again I didn’t realize that until you and Ravi pointed it out! I guess the engineering approach is too deeply embodied in us. Trying to prove or justify everything that comes on our way. I will try some poetry, lets see if some new theorems or postulates come out! :p
OK….its high time i give a comment or else this Guru of mine (in photography) is going to stop giving his pravachans; extended gyan on photography he has gained in a very short period of time…
First of all thanx for mentioning my name…I was the fortunate one to cover the entire event & experience first handed experience on one of the first projects taken up by Urvesh….
I have learnt a lot about photography since then….its not only the depth knowledge that he has acquired but also the short time span in which this was grasped; utilized is really amazing….with every photoshoot done with him I am learning many new things….
Thanx for being “my inspiration” for photography….
Wonderful buddy…too good!!!!
Good job done i am also a photographer, like u i am also using nikon cameras i have d300s,d70s,d60&d40 i have never used a canon till date i dont have any guru in this field till what ever i have learnt is from net & camera manuals one question to you does depth of field varies from one camera body to other or not any how depanding on ccd or cmos plz do reply me regards kapil