“With great power comes great responsibility”
– Uncle Ben (From Spiderman)
Linux is a free and open powerhouse which demands some quality time to get used to. Once tamed, it will give you powers like never before. But more often than not, you will be crippled by the lack of right information about Linux and its touted killer features. One such section is screencasting and the associated video post-production.
This post details three most useful and most-often left out laymen tools for video mastering.
- Screencasting
- Video Watermarking and
- Video Editing
Screencasting
A screen-cast is a digital recording of computer screen output, also known as a video screen capture, often containing audio narration. Generally this is useful for producing tutorials that are more effective than page long texts.
In Linux, multitude of tools exist. Some of the useful ones are Istanbul, Wink and RecordMyDesktop + GTK-RecordMyDesktop. Among these, in my testing Istanbul and Wink failed to impress. Istanbul crashed multiple times during its operation whereas Wink is known to be having issues with Ubuntu.
My recommendation
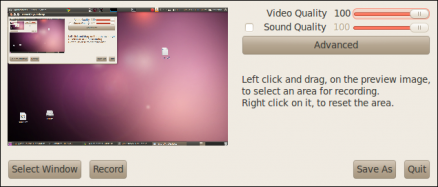
Install Gtk-RecordMyDesktop using Synaptic Package Manager (in Ubuntu). Launching the application presents you with the below screen.
For the terminal addicts, here is what you should do to install the app.
$ apt-get install gtk-reconrdmydesktop
Watermarking
All I wanted was to watermark the screencasted video with my site’s name on it. A seemingly mundane operation took a lot of my time to figure out. Using ffmpeg this process can be easily carried out – so said tons of posts I referred.
But the issue was that the necessary library “watermark.so” was absent in my distro. Many attempts to locate its package/source failed. Finally I downloaded and compiled ffmpeg sources (once of the virtues of being open!) upon which I got what I was seeking for. Once you make sure that the library is available its just a matter of executing one line of code.
$ ffmpeg -sameq -i inputfile.video -vhook ‘/usr/local/vhook/watermark.so -f watermark.jpg’ outputfile.video
While watermarking, make sure that the image used is of the same size as that of the video, also with a gray background.
Video Editing
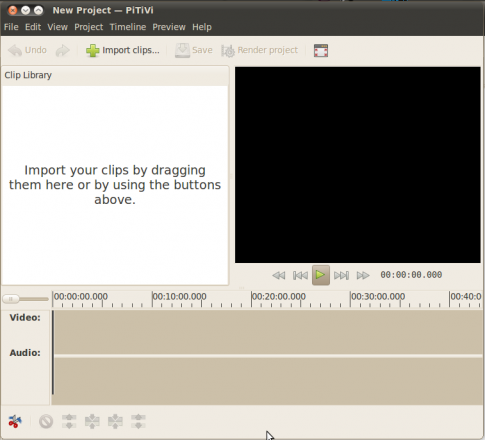
For any editing works that you may want to add to the video, you can use the tool – PiTiVi . It closely resembles Windows Movie Maker in appearance and functionality. Use synaptic Manager or Apt-get to install the app using the name “pitivi”.


